Shopify integration required
We provided a detailed step-by-step guide below, but it may be quicker to just watch the short video. The process is much simpler than the length of this guide suggests.
Part 1: Creating Codes
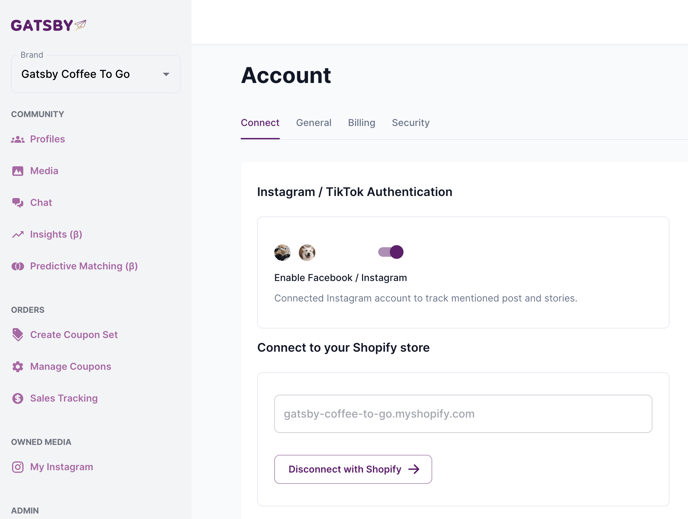
Step 1: Make sure you've connected Shopify
You should see your Shopify url under the Connect page. If you don't, connect Shopify first
Step 2: Understand How Discount Code Sets Work
You're not going to be making codes one-at-a time, but rather you will be configuring a set of codes that all have the same parameters. This means that you can edit a code set and all the codes in that set will update as well!
The end result is that your Discount Codes will all be grouped together in Shopify, like this:
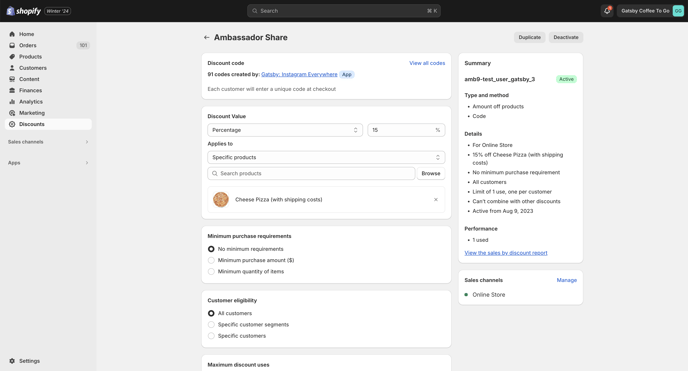
And if you click on "View all codes" at the top of your Code Set, you would see each code: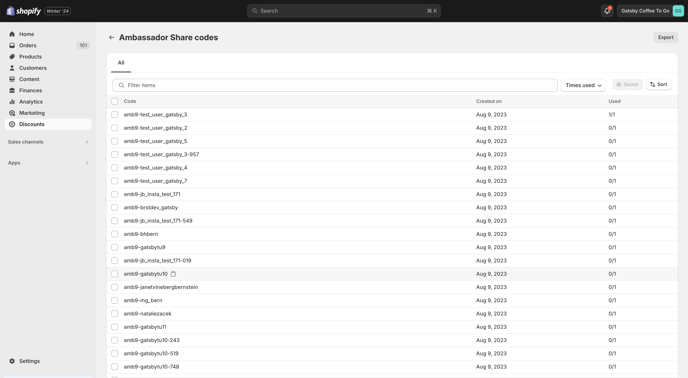
Step 3: Create your Code Set
On the left side, click "Create Coupon Set" and fill out the details. For "Segment" select the Gatsby segment in which all segment members should have this code.
If you're unsure on which segment, use Email Connected True. By doing this, everyone who applies to your program will be generated a code and you can decide in the Klaviyo Flow logic or other integrations who should receive their code and when.
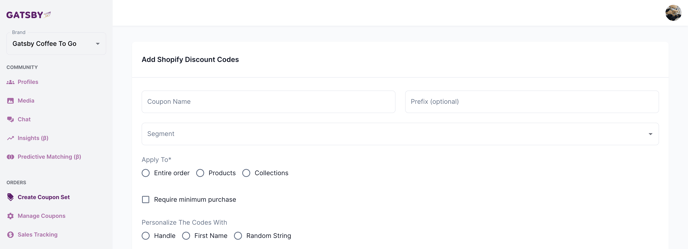
Tip 1: It is highly suggested that you add a prefix so that you can easily track these codes in Shopify and other reporting tools. Plus if you're using the person's Instagram handle as their discount code, you'll want to add a prefix so you can use their Instagram handle again for other campaigns.
Tip 2: As written above, it is best practice to use "Email Connected True" as the Segment. This way everyone is generated a code and you can always decide in Klaviyo which people should receive that code, and when.
Codes will be generated as soon as you complete the form, and they will continue to generate in real-time going forward as new profiles join that segment.
Step 4: Wait a minute and you'll see your codes start to appear
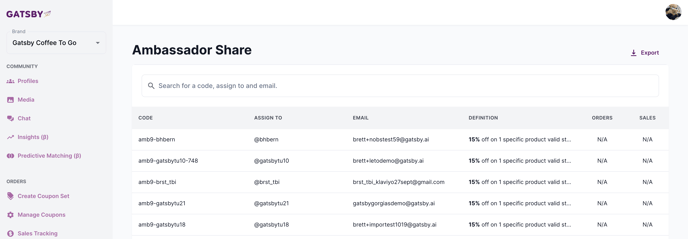
Click "Manage Coupons" and you will see your list of code sets. Next to each code set is an icon of an eye. Click the "eye" to see all the unique codes that are being made for each member of that segment.

Part 2: Distributing codes through Klaviyo Flows
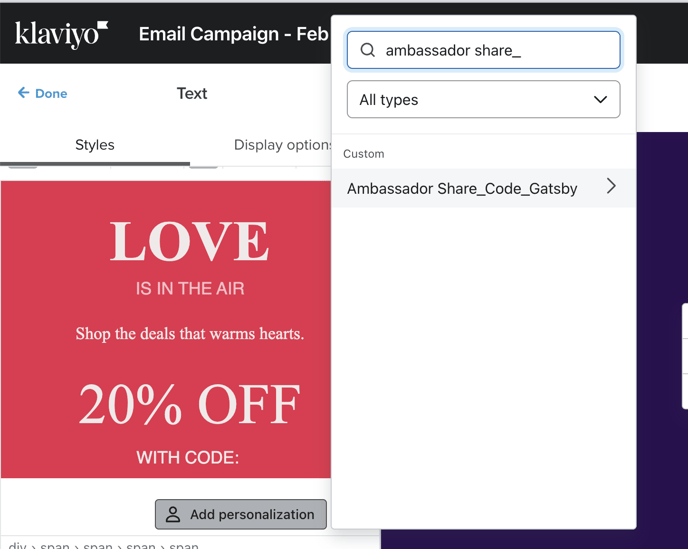
Once a code is generated, it will sync to Klaviyo as a profile property. The profile property naming convention is [code set name]_code_gatsby
See below for an example:


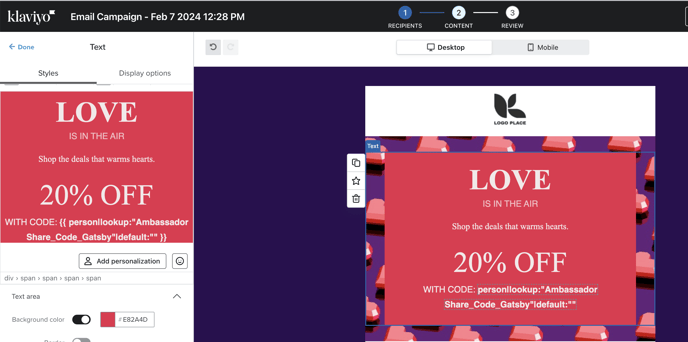
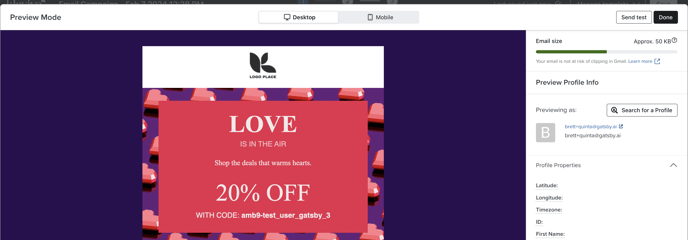
To distribute each person their code, simply select this profile property when creating an email or sms:
Part 3: Tracking Revenue
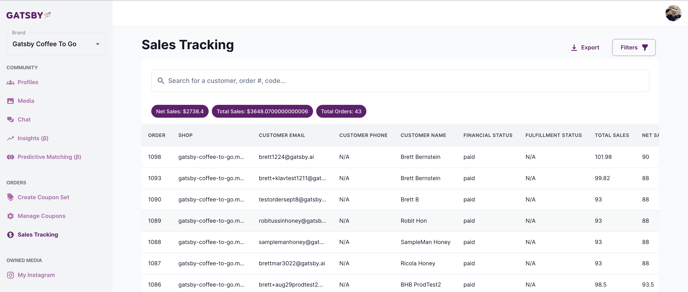
Every order and every dollar that comes through these codes will be tracked in Gatsby for you automatically. Open the "Sales Tracking" view on the left side to see your orders
Every order also triggers an event in Klaviyo:

And a running total for Total Referral Sales and Total Referred Orders
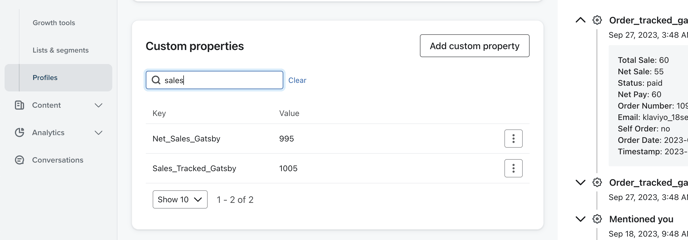
Pro Tip: Orders where "self order" = true will be excluded from these Net Sales and Total Sales counts, so you are only seeing the aggregate amount of referred revenue to your store. a "Self Order" is when the ambassador's email address and the email address on the order are the same.
This is great data to use in Segments / Flows:
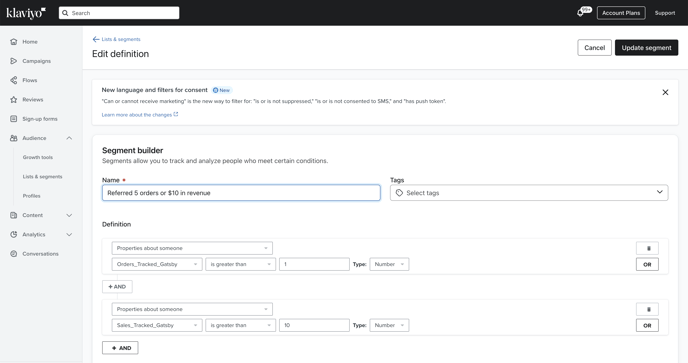
For more information on these properties and all the different events and properties Gatsby syncs to Klaviyo, refer to this guide: https://help.gatsby.ai/en/what-events-properties-will-sync-with-klaviyo
For more details on our Klaviyo Flow templates, visit this guide: https://help.gatsby.ai/en/klaviyo-flow-templates