Instead of asking for both email & handle on your Shopify Post Purchase Page, you can use the Mesa App to ask for just handle
This integration requires you install the Mesa Workflow Automation app for Shopify.
Mesa is happy to support you and this integration. Contact Mesa Support here.
Getting into this, you'll notice there is some code involved, but it does not require a developer, we give you everything you need to get this done, and you won't have to mess with theme files or anything. Please plan on 30 minutes from start to finish.
Once you have the Mesa app, continue below:
1. In the MESA dashboard, click Create New Workflow

.
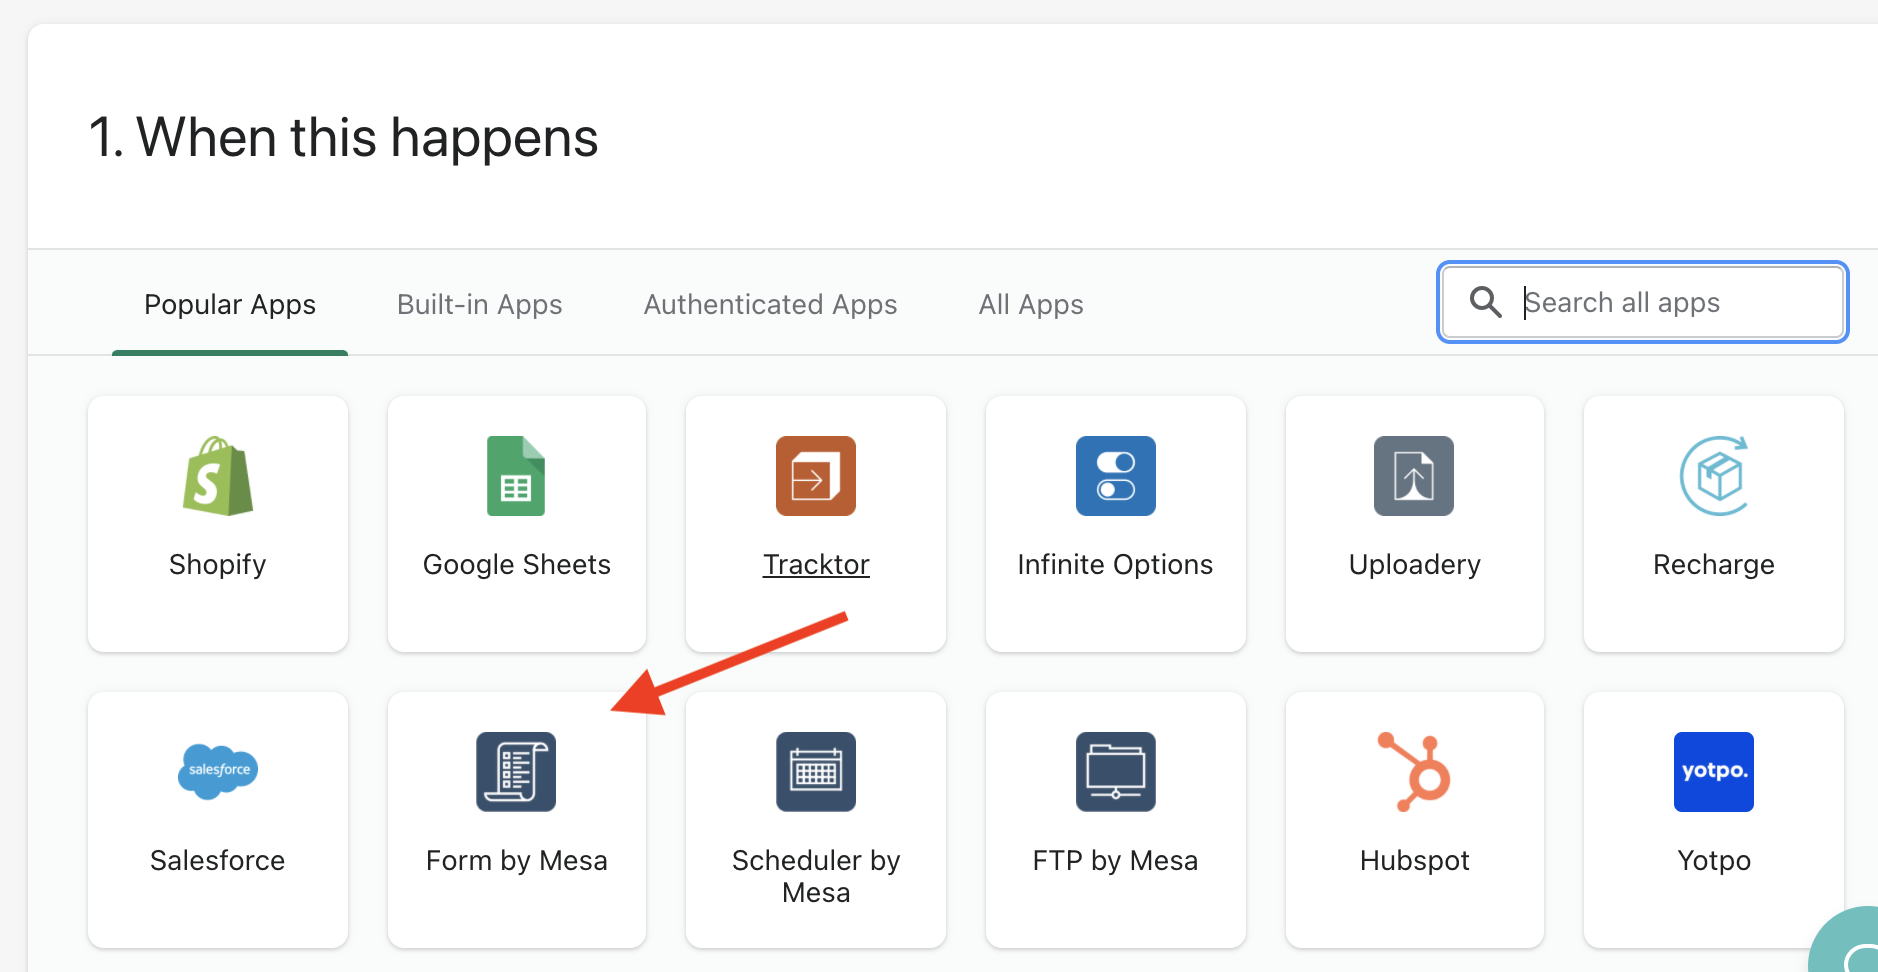
2. Under the Popular Apps tab, click on Forms by MESA app.
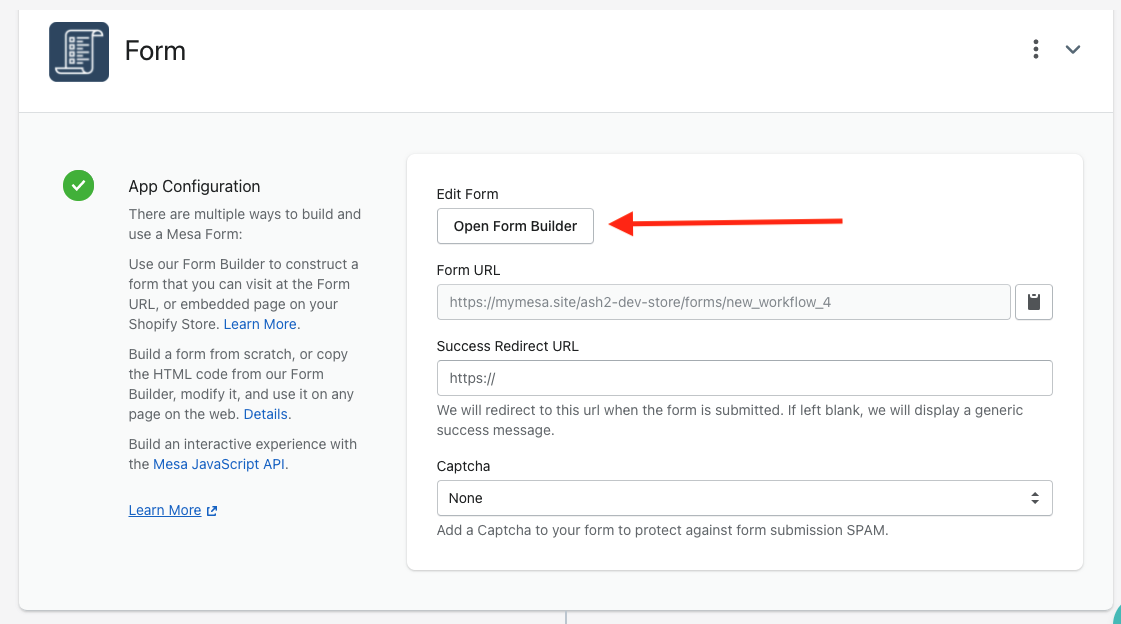
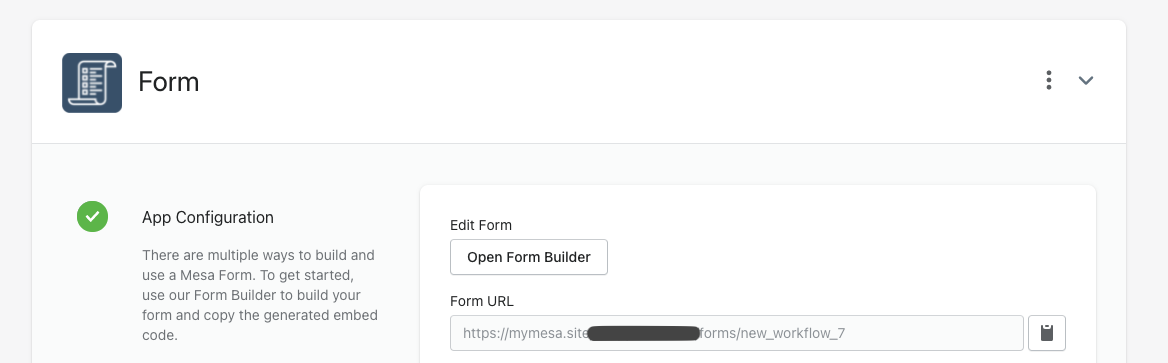
3. Click on the Open Form Builder button in the Form Trigger.
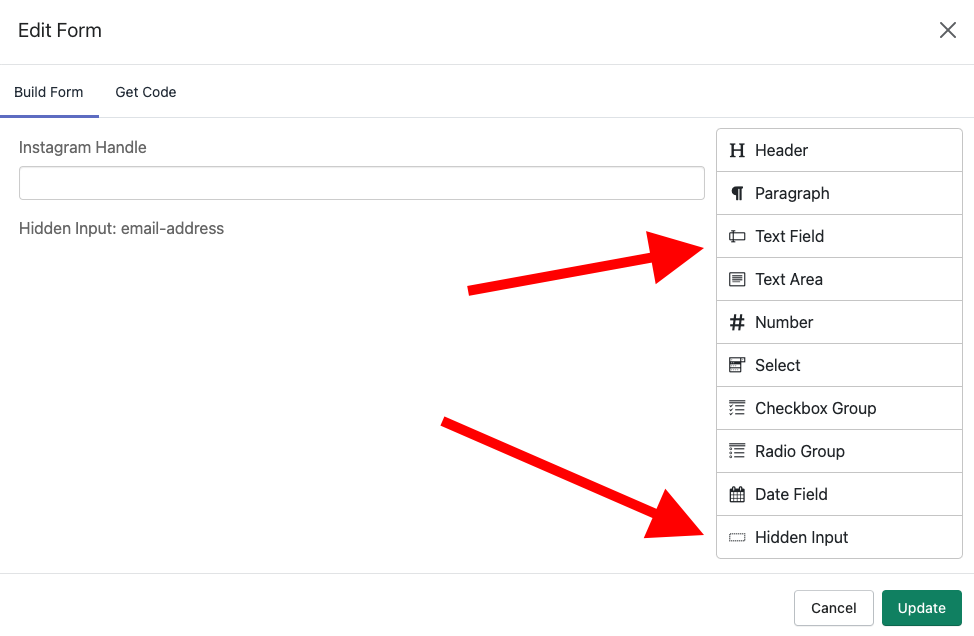
4. Drag the Text Field and Hidden Input fields onto the left-hand side within the Form Builder.
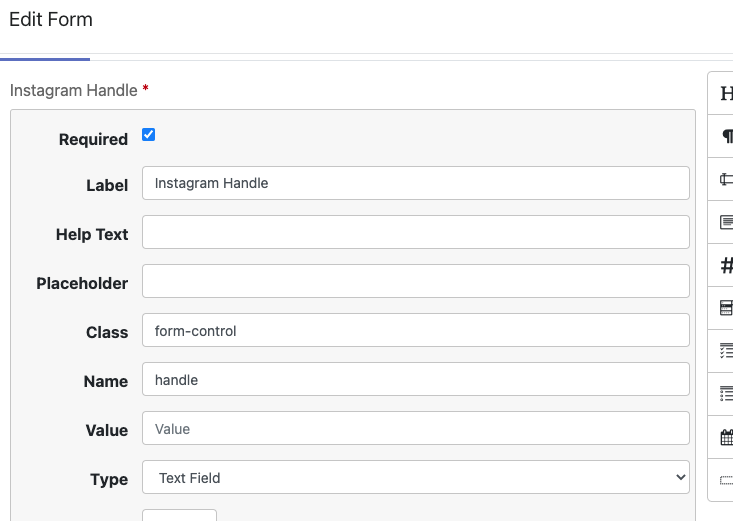
5. For the Text Field, click on the pencil icon and rename the Label to Instagram Handle or whatever you'd like. Make sure that the field is marked as Required so that you actually receive information from your customers.
6. For the Instagram Handle's Name field, rename the value to "handle".
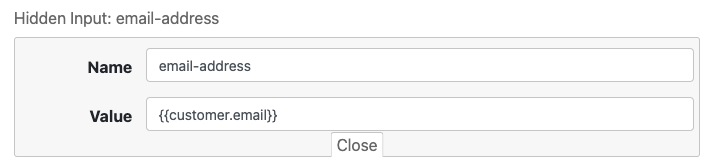
7. For the Hidden Input, click on the pencil icon and rename the Name value to "email-address".
For the Value field, make sure that you enter:
It is extremely important to enter this so that your Gatsby contact gets created with the customer's email address.
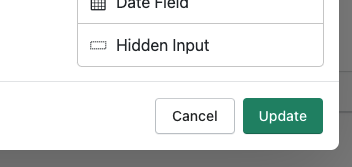
8. Then, click on the Update button within the Form Builder.
9. Add Gatsby as your next step in your workflow.

10. Log into your Gatsby account > Integrations > Webhook > Create a new webhook. Click Save on the webhook default settings which should look like the below.
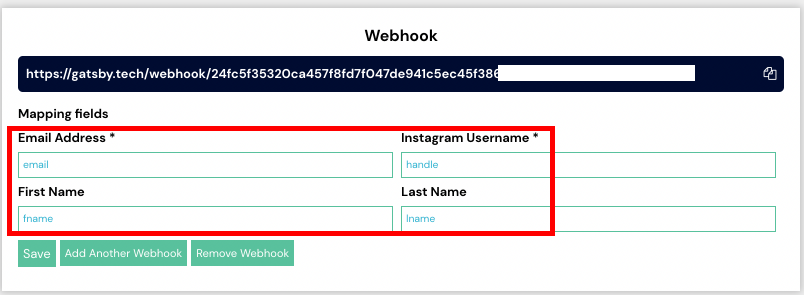
11. Click on the clipboard icon to the right of the URL. Paste the URL you copied into the Webhook URL field in MESA, in the Gatsby Create Contact Step.
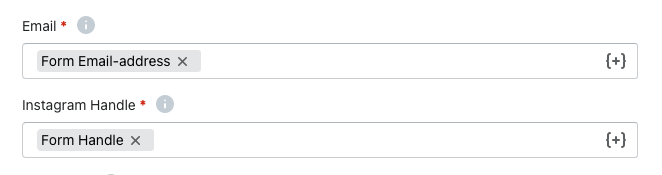
12. Locate the Email and Instagram Handle fields and click on the {+} icon to use MESA's Token feature. Tokens are representations of data. Select the appropriate tokens for both Email and Instagram Handle.
13. Save your workflow and enable your workflow! Check this document out for best practices.
14. Next, we will add this Form to your Order Status page. Scroll up in your workflow and click the clipboard icon to copy the Form URL.
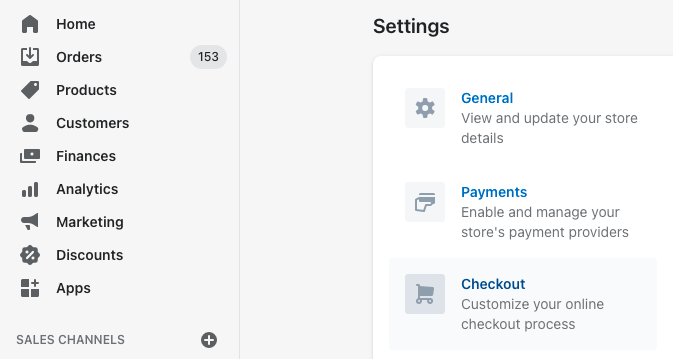
15. From your Shopify Admin, click Settings in the lower left-hand corner of your Shopify admin, and then click the Checkout icon.
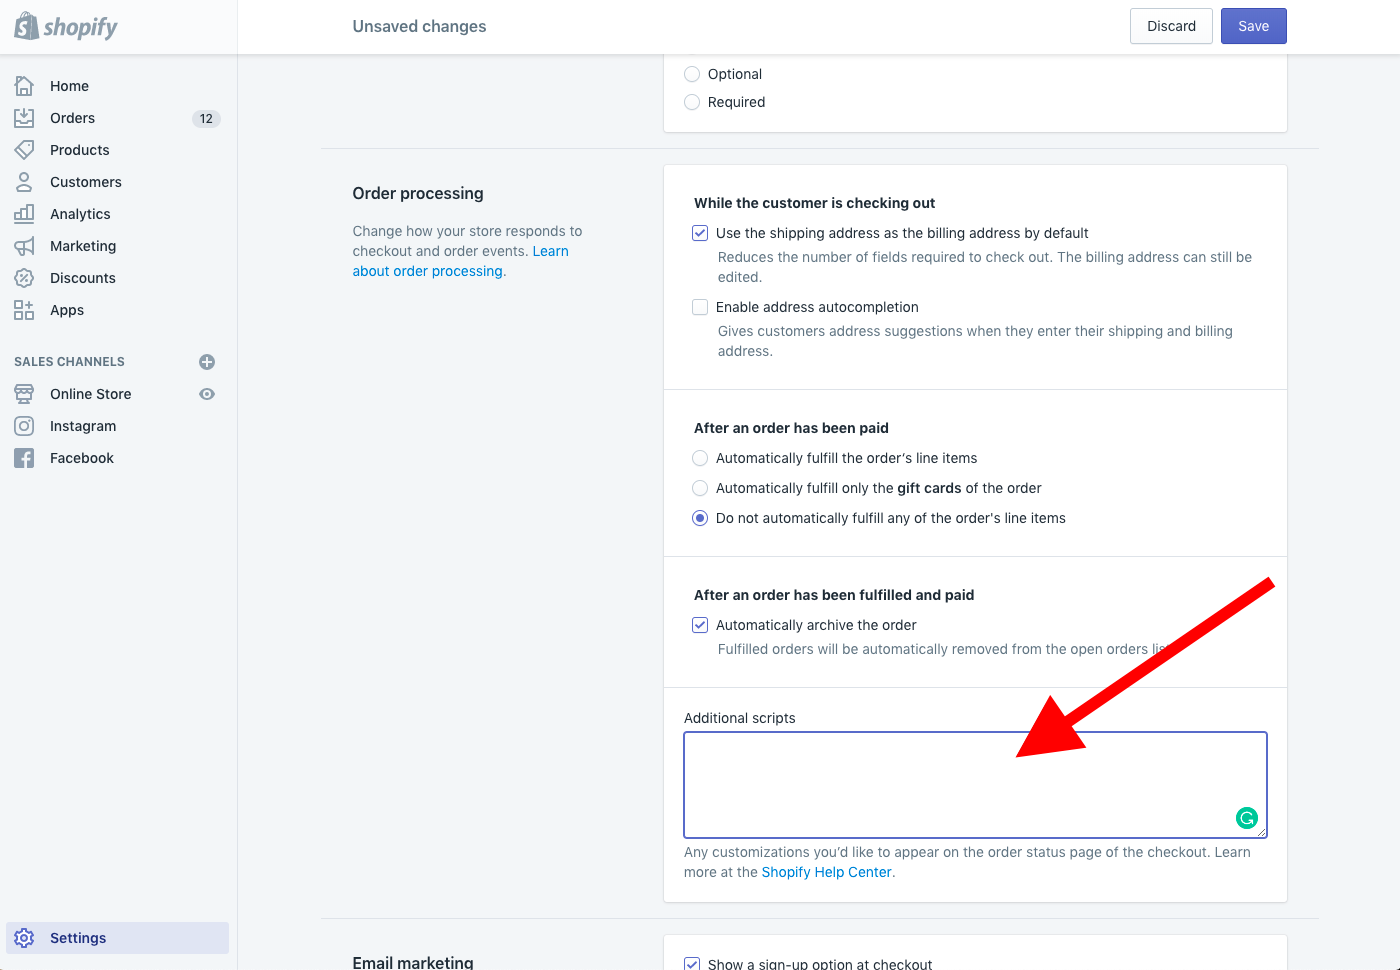
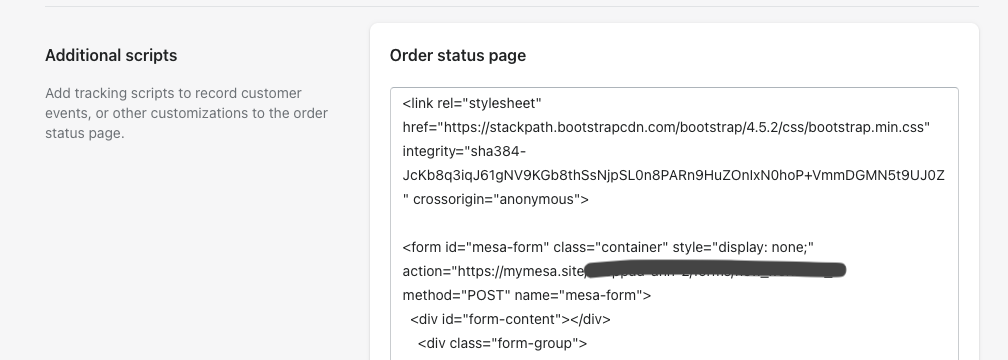
16. In the Additional Scripts section, copy and paste the following snippet of code.
16. Locate this line of code.
17. Replace in the <form> tag with your copied URL.
18. Save your changes and it should look like this now!
19. Follow this document to add a basic layout to your form.
20. That's it! Test your form by making a small purchase on your site, or doing a Test Order.
Also worth noting that these steps above are different and a bit more complex than adding a Klaviyo Form to that same Thank You page, but this process will allow you collect Instagram handles and sync the insights to their customer records without reasking for their email address.
Please let us or Mesa know if you have any questions! You can contact Mesa here.
Let us know if you need help!