The following doc is a bit outdated, in most cases clients don't need to go this route as there are simpler options. Please contact us before committing to this route.
Before getting started:
-
To complete this setup, you will need to request an API Secret from the Gatsby team. Please reach out to us to receive it.
-
Add a field to a form on your website to collect instagram handles. Most common forms to add this field include: popup forms, registration forms, checkout flows, and order confirmation pages. Take note of the name / ID for that Instagram field, as well as the name / ID for the Email Address field, as you will need both of those at the end. For example, those names / field IDs may be: "email" and "ig_handle" and "tiktok_handle"
Step 1: Create Tag Template
-
Please navigate to the tag template under the Template section in Google tag manager
Create new tag template and call it Gatsby Script Tag

-
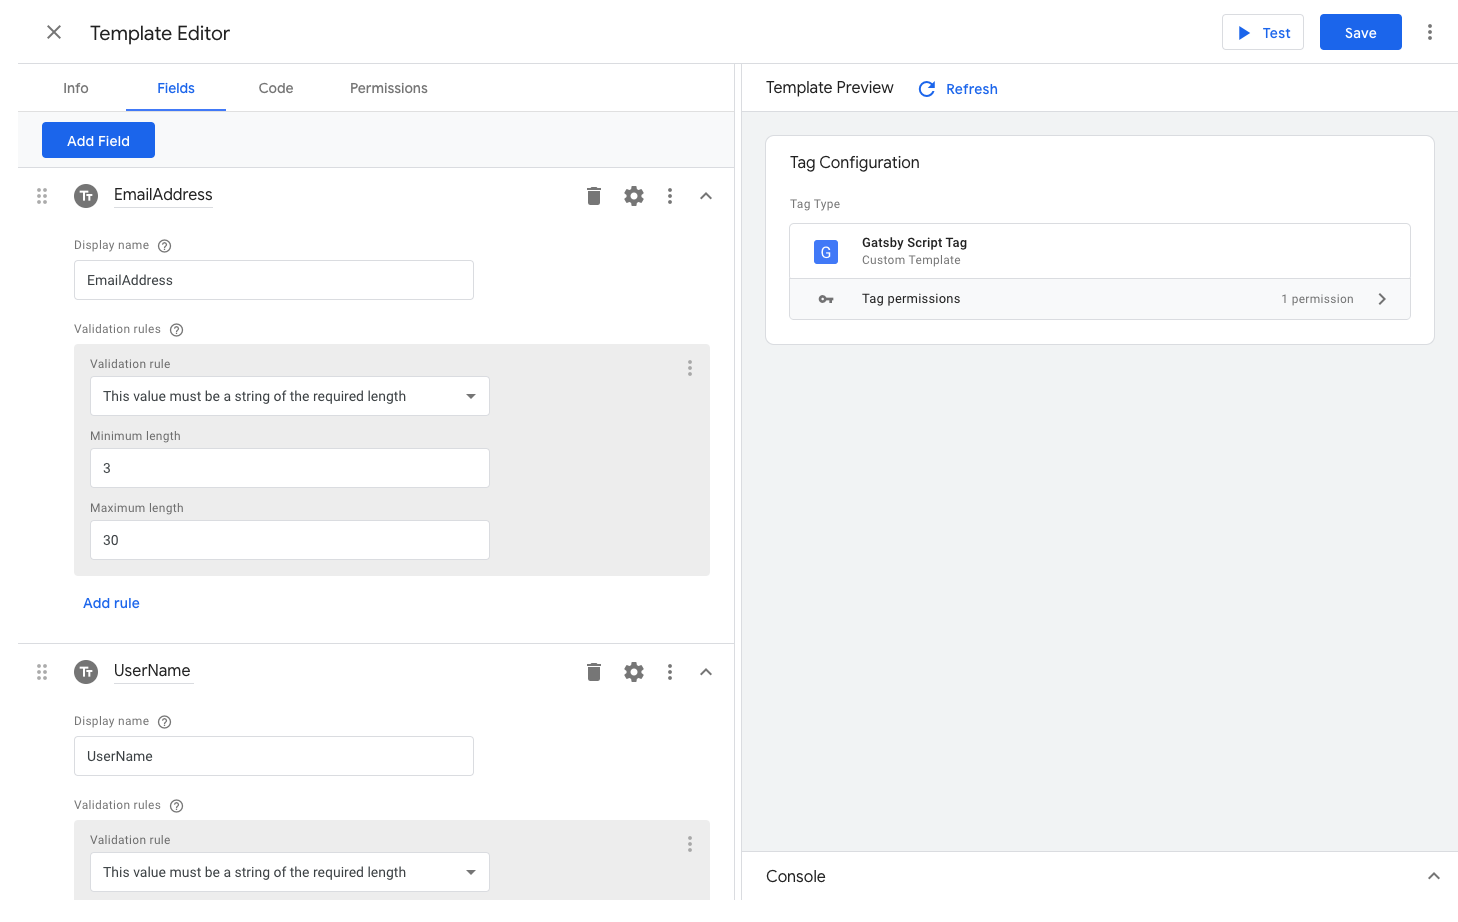
Navigate to the Fields tab and add two "Text Input" fields and name them specifically EmailAddress and UserName (if you're collecting TikTok as well, make a 3rd field and call it TiktokUserName)
-
Add any Validation Rules via the gear icon
-
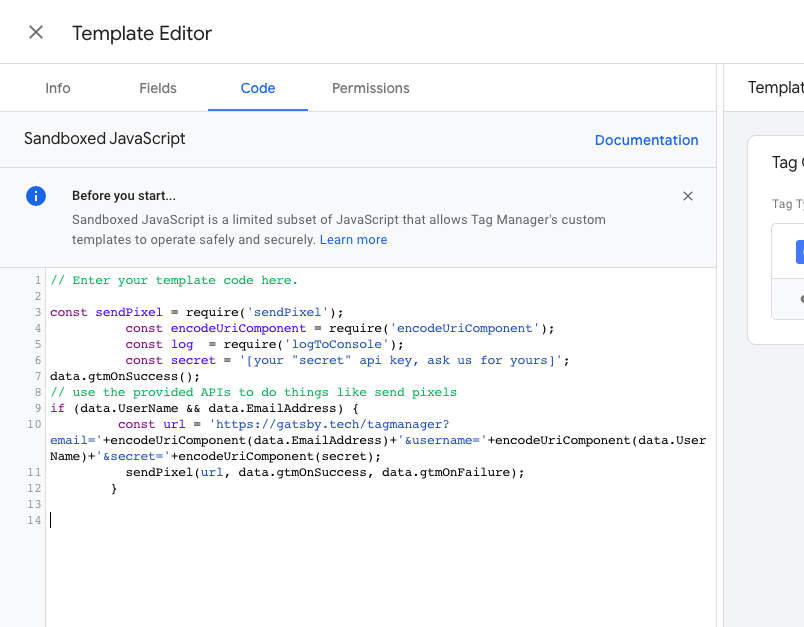
Then navigate to Code tab and place the below code right after the line where it says // "Enter Your Template Code Here" replacing what's already in there.
Note: also be sure to add your secret API key that you've received from us. Remove the brackets though, just leave the single quotes around the API key
If you're collecting Email + Instagram Only:
const sendPixel = require('sendPixel');
const encodeUriComponent = require('encodeUriComponent');
const log = require('logToConsole');
const secret = '[your "secret" api key, ask us for yours]';
data.gtmOnSuccess();
// use the provided APIs to do things like send pixels
if (data.UserName && data.EmailAddress) {
const url = 'https://gatsby.tech/tagmanager?email='+encodeUriComponent(data.EmailAddress)+'&username='+encodeUriComponent(data.UserName)+'&secret='+encodeUriComponent(secret);
sendPixel(url, data.gtmOnSuccess, data.gtmOnFailure);
}
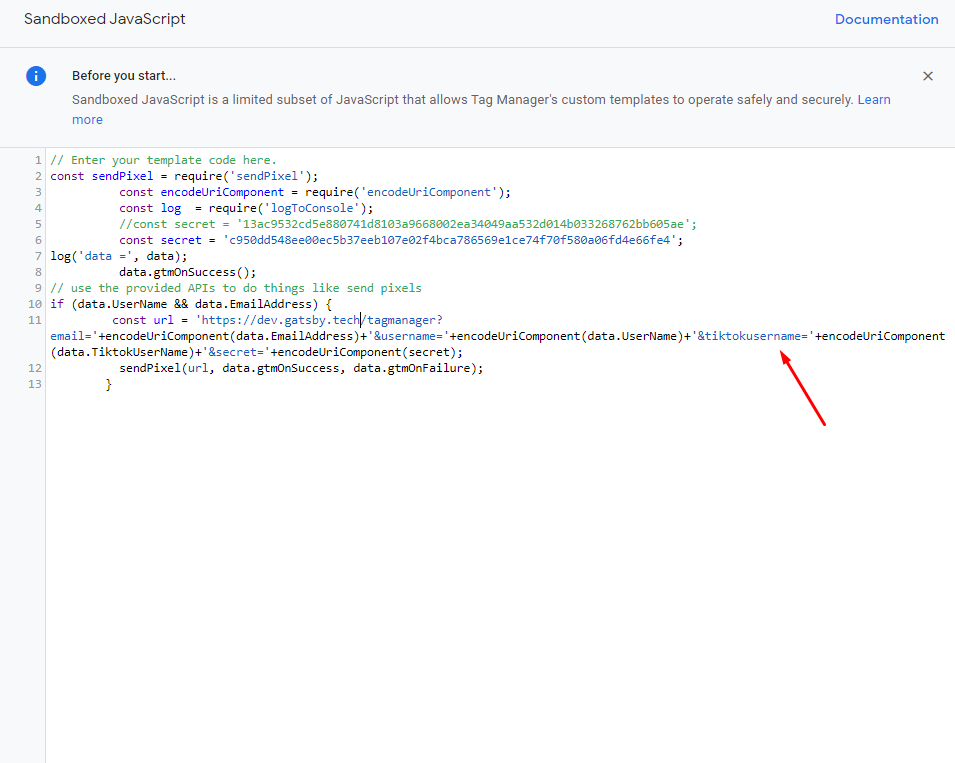
If you're collecting Email + Instagram + TikTok handles:
const sendPixel = require('sendPixel');
const encodeUriComponent = require('encodeUriComponent');
const log = require('logToConsole');
const secret = '[your "secret" api key, ask us for yours]';
data.gtmOnSuccess();
// use the provided APIs to do things like send pixels
if (data.UserName && data.EmailAddress && data.TiktokUserName) {
const url = 'https://gatsby.tech/tagmanager?email='+encodeUriComponent(data.EmailAddress)+'&username='+encodeUriComponent(data.UserName)+'&tiktokusername='+encodeUriComponent(data.TiktokUserName)+'&secret='+encodeUriComponent(secret);
sendPixel(url, data.gtmOnSuccess, data.gtmOnFailure);
}
-
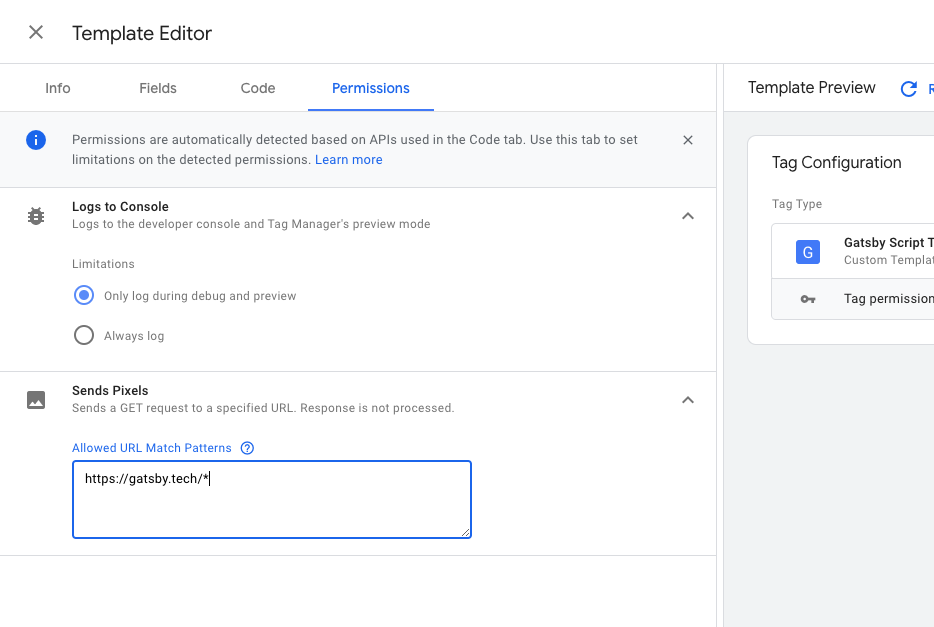
Then navigate to the permission tab
-
Hit "Refresh" if you see the option next to Template Preview

-
A new field will appear, "Sends Pixel"
-
Add the permission url https://gatsby.tech/* to the Sends Pixel field
-
Click Save on the top right
Step 2: Create Variable
-
Click X next to Template Editor / navigate back to the home view
-
Go into the Variables tab
-
Click "New" under User-Defined Variables
-
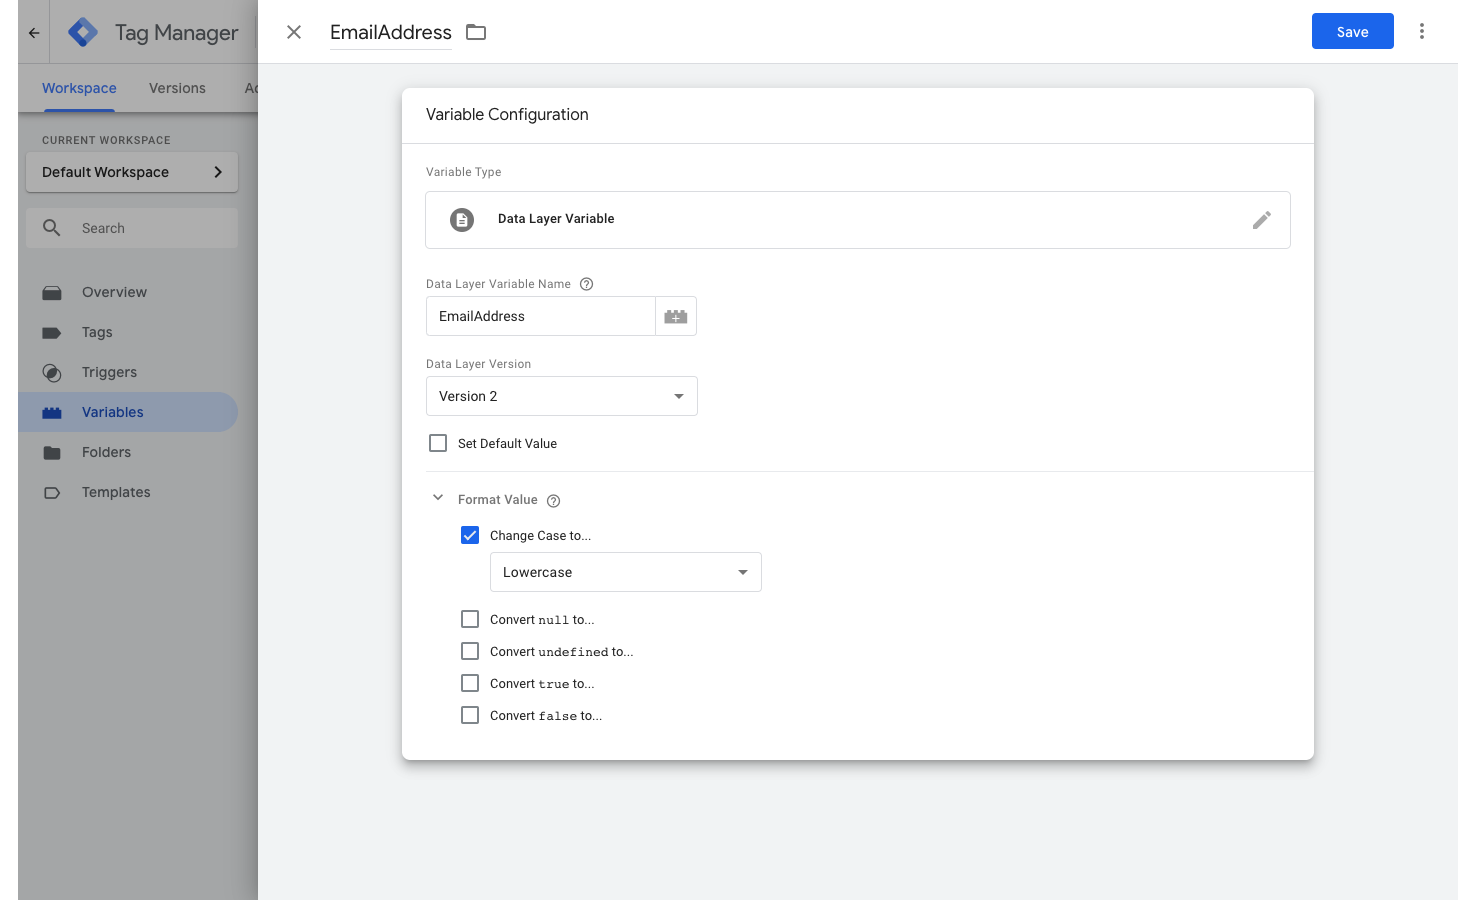
Name it EmailAddress on the top left and click the Pencil icon to choose the Variable Type
-
Choose Data Layer Variable
-
Set Data Layer Variable Name to EmailAddress
-
Click Down on Format Value and select Change Case to Lower Case
-
Click Save
-
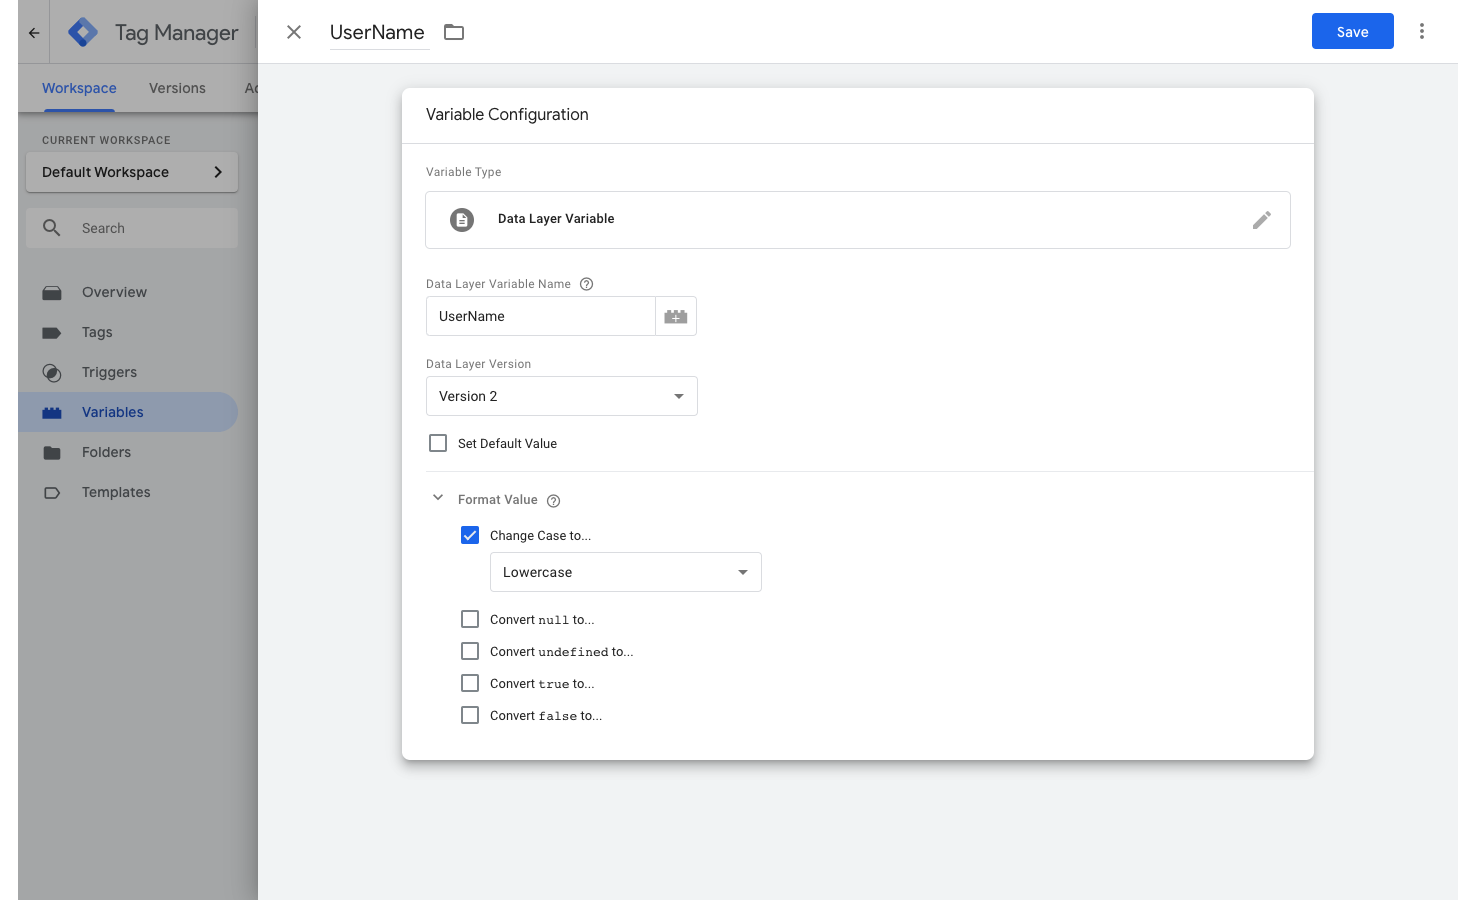
Repeat those steps for UserName (and TiktokUserName if applicable)
Step 3: Create Trigger
-
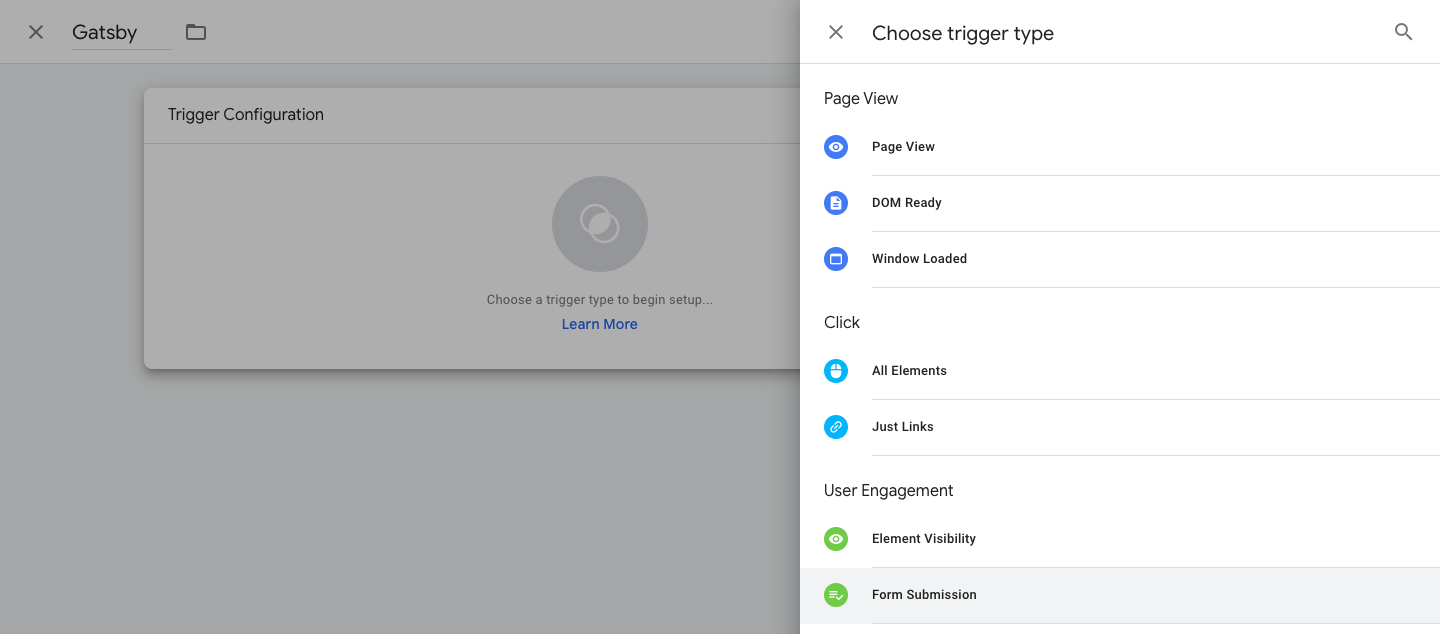
Navigate to the Triggers Tab
-
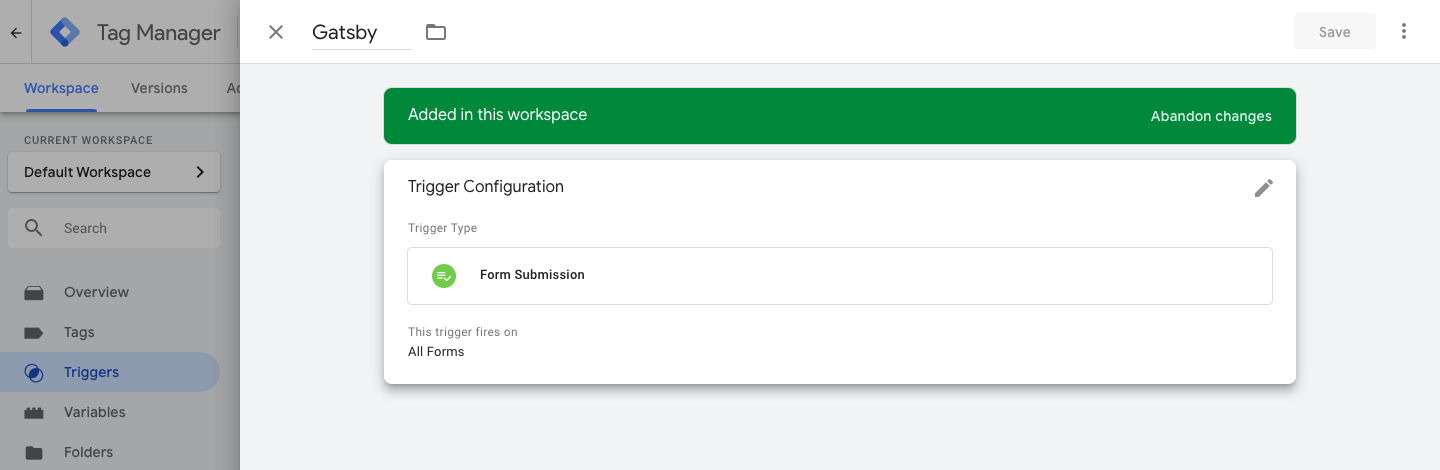
Select New Trigger, name it Gatsby, and choose Form Submission
-
Click Save
Step 4: Create Tag
-
Navigate to the Tags tab, and create a new tag called Gatsby Script Tag
-
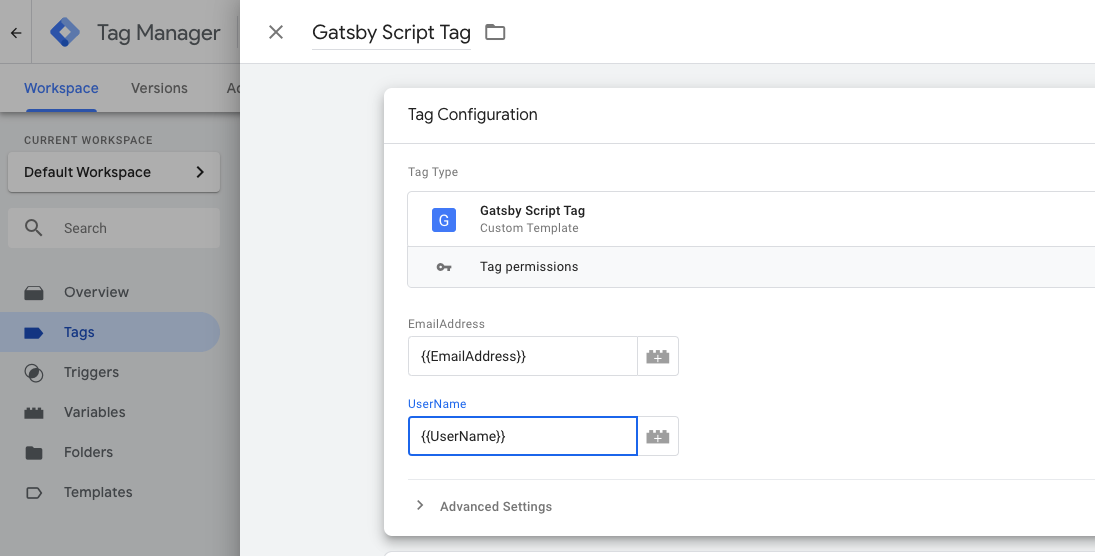
Select the pencil on Tag Configuration, and choose the tag type that we created in the first step "Gatsby Script Tag"

-
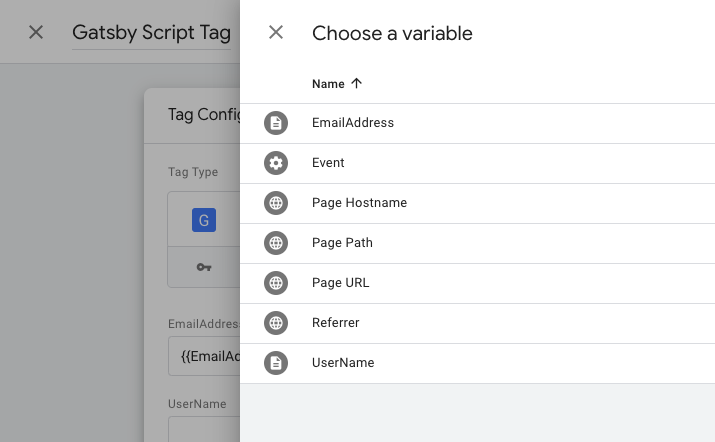
Click the + icons next to the empty fields and select their corresponding variables that we created, EmailAddress and UserName:
-
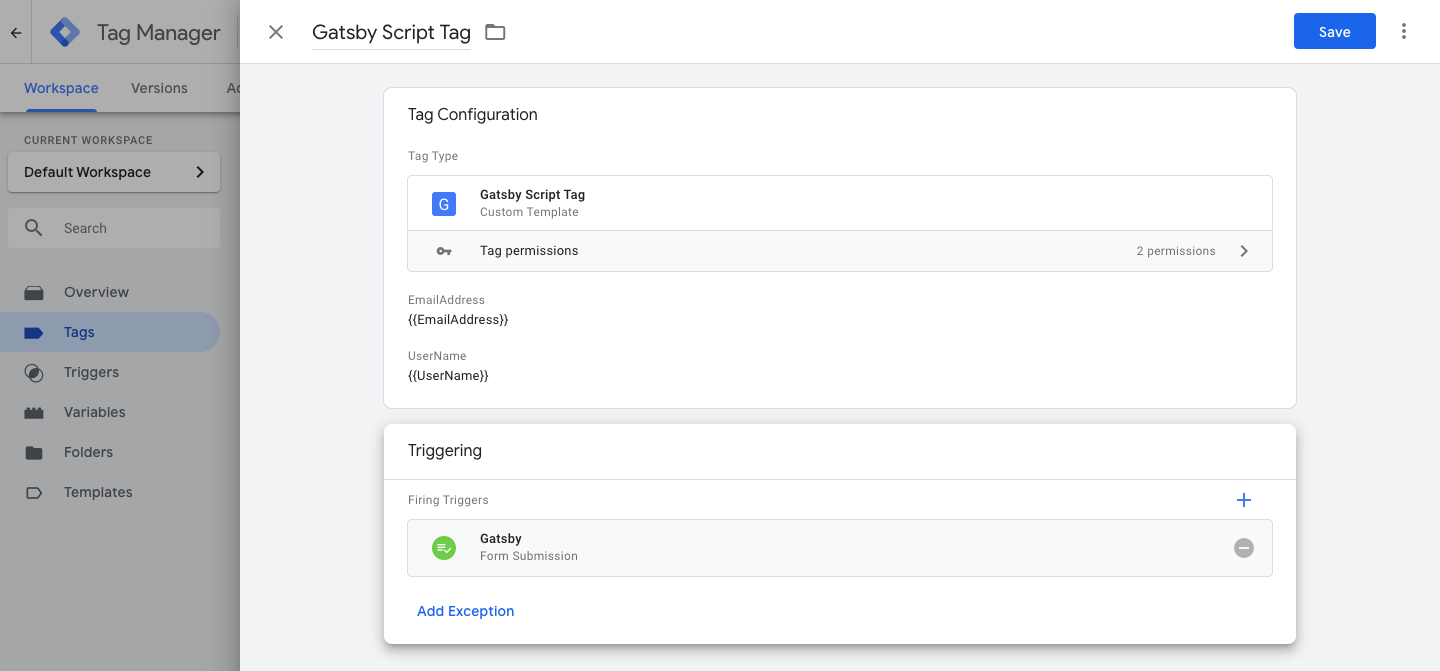
Under Triggering, click the pencil and select the trigger "Gatsby" that we created in the third step
-
Click save and you're done. If you didn't previously have GTM installed on your website, be sure to paste the standard GTM scripts in your website's header and body.
-- The below is only for brands that did not install Gatsby via the Shopify App Store after October 1st 2020) --
Step 5: Pass the variables from your website back to GTM by pasting the following code on your website:
On the submit action of the form fields, paste:
window.dataLayer = window.dataLayer || [];
window.dataLayer.push({
'EmailAddress': email,
'UserName': ig_handle,
'TiktokUserName': tiktok_handle
})
And just be sure to replace the bold fields with the specific names / IDs you created for the Instagram and Email Address fields in the form, as mentioned before step 1 at the top of this guide.
Let us know any questions!