The below includes three different options (Webhooks, Google Tag Manager, and Post API) for sending data from any custom form into your Gatsby account.
Webhooks
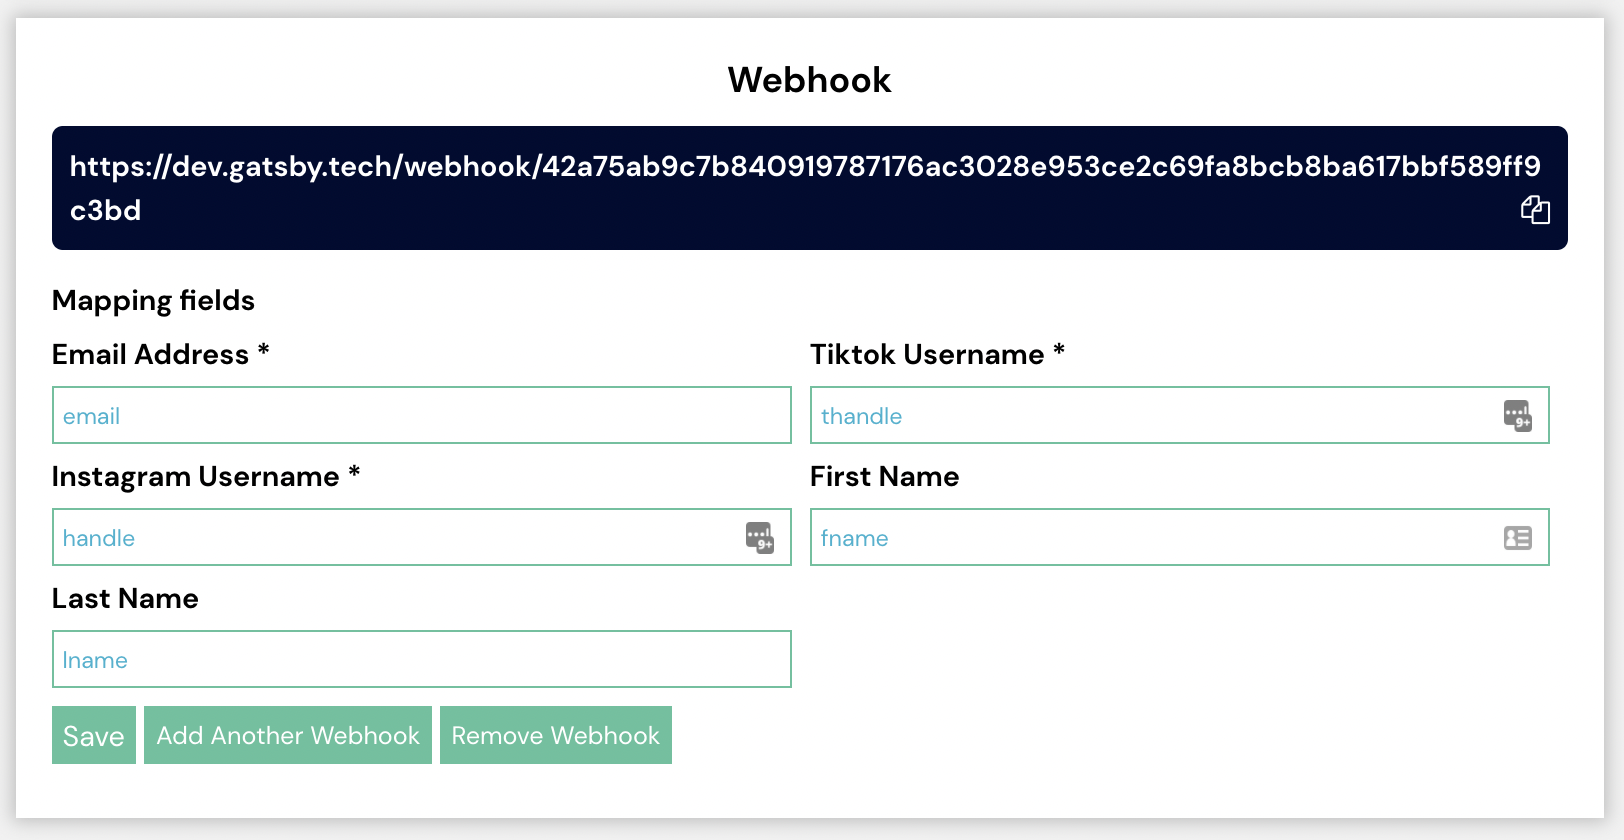
Your Gatsby account comes with a unique webhook URL and an easy way to map the field IDs for Email Address and Instagram Username.
If you're unfamiliar with Webhooks, it's essentially a way to pass data from one place to another when an event happens, like when a form is submitted.
How to setup your webhook:
-
Navigate to the Integrations Tab >> Webhook
-
Either use the default field ID's in your form, or enter new field IDs that map to those field ids in your form, ie Instagram Username could be mapped to a field ID called "handle" and TikTok Username mapped to a field ID for "thandle".
-
Click "Save" and click the "Update Campaign" or "Launch Campaign" button in the header of Gatsby
Even if you're only asking for Email and IG for example, you still need something entered for all these fields.
Now anytime someone submits your custom form, their email address and Instagram username will pass to your Gatsby account (in addition to wherever else you have your form submitting to).
For an example of Webhooks in practice, see our guide on Connecting Gatsby with Zapier and Connecting Gatsby with Wisepops.
Google Tag Manager
Please follow the detailed instructions on this guide for creating the tag template, variable and trigger in GTM.
If you're familiar with GTM, the basic premise is that you're creating variables in the data layer for Email Address and Instagram Handle and using GTM to pass those handles to your Gatsby account.
The GTM guide may look daunting, but it's just very detailed with information for every step. Should take about 30 minutes to setup.
Post API / Basic HTML
Below is basic HTML that you can use to create a generic form for email address & Instagram handle that will send the information to your Gatsby account.
Note: upon clicking the button, it will redirect to an API success page. We are working on adding additional default html or solutions that will make that experience more user-friendly.
In the meantime, you may want to use our webhooks or integrations with Klaviyo, Justuno or Wisepops forms to better control the form experience.
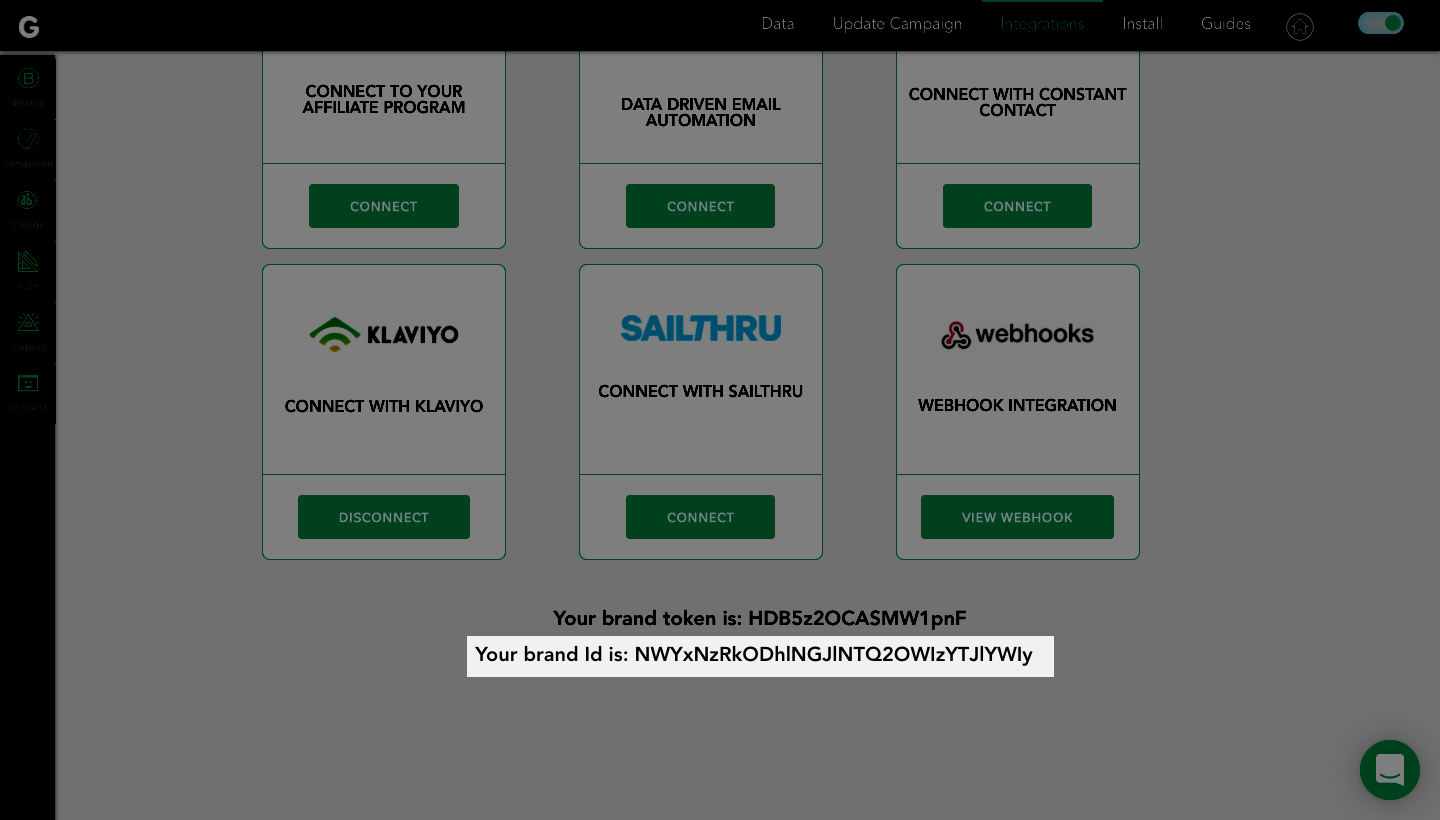
Step 1: Find your Gatsby Brand ID
-
Log into Gatsby
-
Click Integrations in the header
-
Scroll down and just take note of your Brand ID. You will need it later
Step 2: Add the follow HTML to create a basic form that asks for Email Address and Instagram Handle and passes that info to your Gatsby account upon submissions:
<form method="post" action="https://gatsby.tech/shopper/post">
<label for="email">Email Address</label><br>
<input type="email" required="true" id="email" name="email" value="" class=""><br>
<label for="instausername">Instagram Username</label><br>
<input type="text" required="true" id="instausername" name="instausername" value="">
<label for="tiktokusername">Tiktok Username</label><br>
<input type="text" required="false" id="tiktokusername" name="tiktokusername" value="">
<input type="hidden" required="true" id="brandID" name="brandID" value="YOUR BRAND ID"><br><br>
<input type="submit" value="Submit">
</form>
Step 3: Replace the YOUR BRAND ID with the ID you found in Step 1 above from Gatsby. Keep the quotation marks around it.
That's it, now this form will send the email address and handle to your Gatsby account, where you can then send it to your ESP like Klaviyo (Step 2 of this guide).
Note: In order for your Gatsby account to receive submissions, make sure you have clicked the "Launch Campaign" button in your account and entered your billing information.
Let us know if you have any questions.